
The frigid temperatures and imminent snowfall that follow the winter season are challenging for many farm animals, especially chickens. Chickens are more susceptible to getting frostbite and have a more challenging time adjusting their body to extreme temperatures. This issue leads to serious chicken death outbreaks in the farming community, but there’s a way to avoid tragedy.
Here’s how you can insulate your chicken coop:
1. Inspect and repair any holes or damage.
2. Install proper ventilation away from your chickens.
3. Lay insulation down to trap warmth.
4. Utilize additional heating equipment.
5. Repeat previous steps when necessary.
You can also take other steps to winterize your coop and keep your chickens safe during cold months. For a more detailed guide on how to properly insulate your chicken coop, keep reading.
Steps on How to Insulate a Chicken Coop
1. Inspect and Repair Holes or Damage
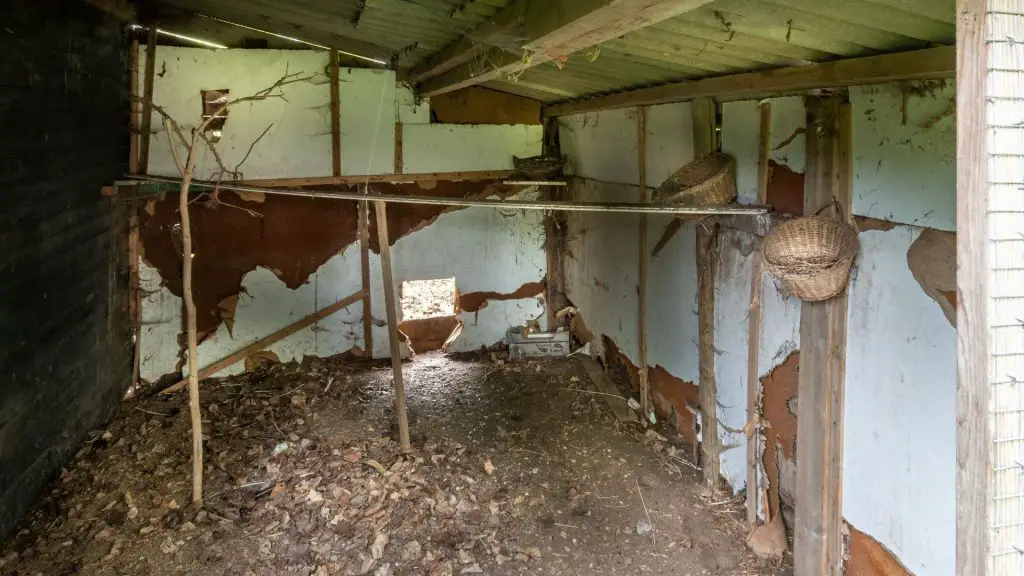
Before laying any insulation, it’s essential to fix any issues with the coop walls and roof. If left untreated, damage in the form of holes and warping will deteriorate the structure’s integrity. On top of that, the insulation won’t be able to do its job if a draft seeps through cracks and holes.
Before winter arrives, it may be helpful to take a once-over of the chicken coop. Pull and replace any warped boards, patch up leaks in the roof, seal up any holes. Doing this will ensure heat stays inside the structure, and it’ll also keep out any unwelcome guests from the outside.
However, it’s essential to remember that proper ventilation is key to ensuring your chickens’ safety and good health. If you notice small nail holes that are less than a ¼ inch (0.64 cm) in diameter, it’s okay to leave these. Air can’t travel through these minuscule holes nearly as well as a bigger hole.
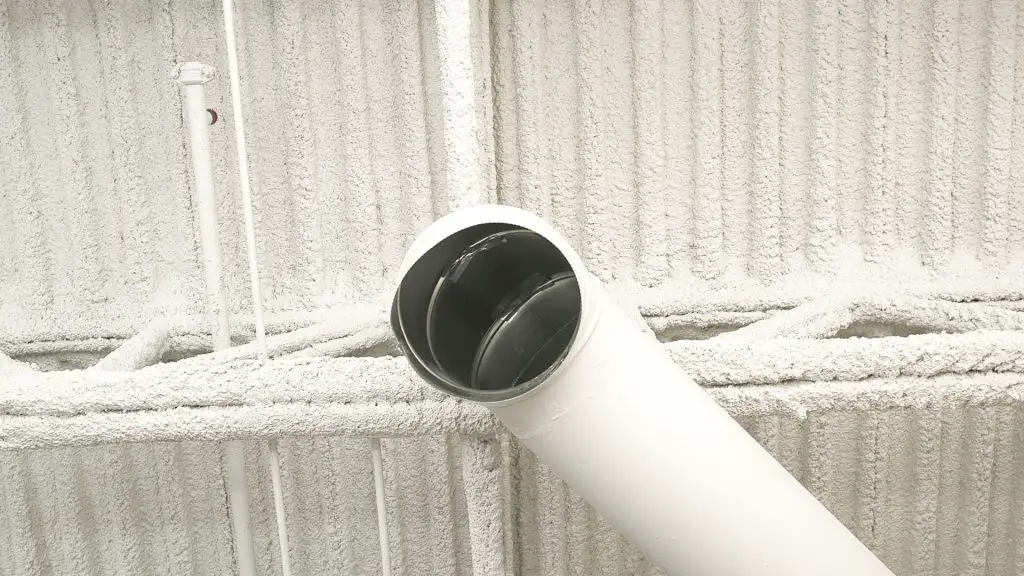
2. Install Proper Ventilation Away From Your Chickens
Although installing a ventilation system will bring in a breeze or cold winds, it’s vital to do this anyway. Contrary to popular belief, ventilation and drafts are two entirely separate things. While ventilation is the constant flow of air in and out of a structure, drafts are a less structured and uneven air distribution.
Chickens need proper ventilation for a variety of reasons. For starters, too much oxygen buildup and not enough release can cause carbon monoxide levels to escalate rapidly.
Humidity levels will also skyrocket, which can negatively affect egg output when they get uncomfortable. High humidity also presents an issue because it allows for mold growth too.
3. Lay Insulation Down to Trap Warmth
Once you’ve patched the necessary damage and sorted out ventilation, it’s time to install insulation inside the coop. There are a few different insulation options to choose from:
- Foam board. Foam board insulation is a rigid panel made of polystyrene, polyisocyanurate, or polyurethane. You can customize the boards to fit just about any setup.
- Fiberglass. This insulation comprises super-fine glass fibers and is commonly found in attics and garages. If you use this type of insulation, experts recommend the batt or roll fiberglass rather than loose-fill.
- Closed-cell spray foam. This foam is a spray-applied plastic that doubles as insulation and an air seal. Foam is a popular insulation method as it’s known for being durable and water-resistant.
Installing Foam Boards
Installing foam board insulation requires you to cut each board to fit a designated area in the chicken coop. While this may require more work than the other two options, it’s still relatively easy to complete. To install, you’ll need your foam boards, a measuring tape, and something to cut pieces to size.
You’ll also need to use caulk to make sure everything is airtight. Doing this extra step will make sure the insulation traps heat and none of it leaks out. You’ll also need to cover the walls and the floor to protect the insulation from chicken feet.
Installing Fiberglass
Just like with foam boards, you’ll have to cut the fiberglass to size if you choose to use batts. It’s also important to note that fiberglass can’t be crammed into corners. Although it seems feasible, this will create air pockets in the insulation, and air will leak through.
To install fiberglass rolls or batts, gently place them into any cavities and staple the batt into place. Fiberglass can cause itchiness when touched, so you’ll also need to cover walls and the floor to protect the insulation and your chickens. If the batt has paper or foil backing, it should face inward. The backing acts as a vapor barrier and helps prevent moisture from building up inside the coop.
Installing Closed-Cell Spray Foam
Closed-cell spray foam is, by far, the easiest of the three insulation options. To insulate, all you need to do is spray the foam directly into each cavity. You should spray the foam until it reaches 2-inches (5.08-cm) deep to create a proper air seal. The foam also has a built-in vapor barrier to prevent excess moisture from seeping in.
Although it isn’t required to cover up, the chicken coop may be worth it to prevent curious chickens from pecking at the solidified foam.
4. Utilize Additional Heating Equipment
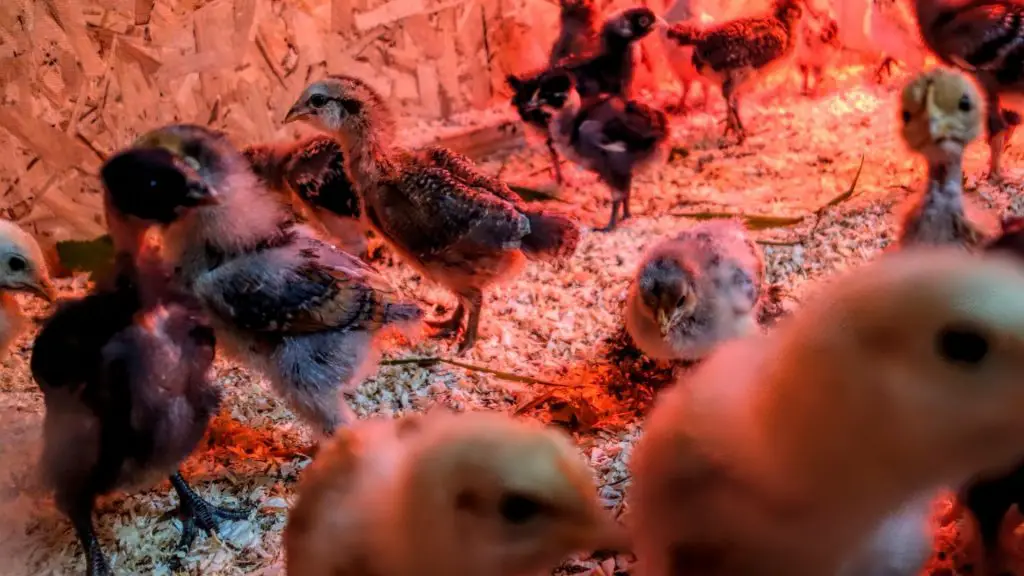
On particular frigid winter days, insulation may not be enough to keep your chickens warm in their coop. When this is the case, it’s helpful to use additional heating equipment to facilitate warm temperatures. Although heat lamps are widely available at any farm or pet store, most expert chicken owners recommend using a coop-friendly heater instead.
Heat lamps are more likely to cause fires as the coop is dusty and lined with highly flammable hay. They also prove dangerous as they can burn out during the night, causing sudden temperature drops.
While heaters and other equipment are helpful, they aren’t always necessary. Before investing in additional heating help, find out whether your breed of chickens is among the weather-resistant type. Some chickens have an easier time acclimating to cold temperatures than other breeds.
5. Repeat Previous Steps When Necessary

Performing regular maintenance on your chicken coop is important for increasing the longevity of the structure. The better care you provide for the enclosure, the longer it’ll last for your chickens. Not to mention, well-taken care of chicken coops make a much more comfortable home for your chickens than the latter.
Additional Tips on How to Winterize Your Chicken Coop
Along with the steps listed in this article, there are other actions you can take to help keep your chickens comfortable in the wintertime:
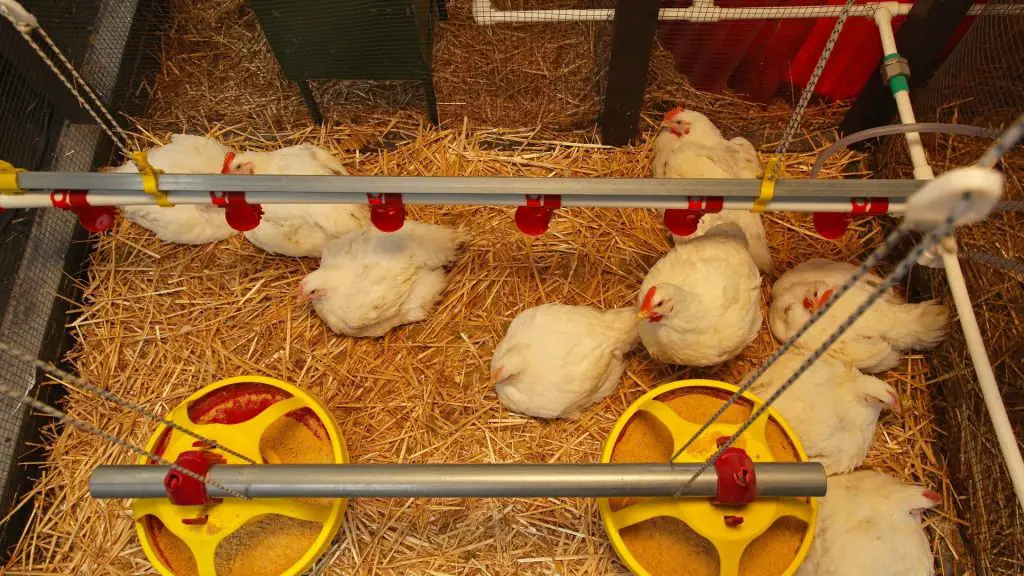
- Use extra straw and bedding on the floor. If paired with a sound insulation system, extra padding on the bottom will help your chicken retain more body heat. Along with this, extra bedding also means a more comfortable spot to lay eggs.
- Remove snow from the area. If you notice snow accumulating around the coop, remove it to avoid water damage. The same applies to the chicken coop roof. However, a thin layer of snow can also act as a natural insulator.
- Clean inside the coop often. Chicken poop can potentially contain harmful pathogens, including E. Coli and Salmonella, among other things. The fecal matter also releases ammonia into the air, which can cause other health issues. When these issues mix with heat, they’ll get worse.
Summary
Keeping the chicken coop clean and extra padding on the floors is essential for an adequately winterized chicken coop. It’s important to perform regular checks and maintenance on the structure, as it plays an integral part in the comfort of your chicken brood.
List of Sources
10 Big Mistakes First Time Coop Builders Make